Showing posts with label AdSense Ads. Show all posts

Sep 22, 2010

Submit Your Blogspot Sitemap to Yahoo

Yahoo Site Explorer Add My Site page
One of the most important ways to attract traffic to your site is to ensure that your Blogger (Blogspot) blog is properly indexed by popular search engines such as Yahoo. If you want to increase your chances of having your site quickly indexed by the Yahoo search engine it pays to submit your site and your feed. In this tutorial we will be covering the process of signing up with Yahoo, authenticating your site and adding your site feed to Yahoo Site Explorer.

Yahoo can be notoriously slow at indexing and will not necessarily include all crawled pages in its search results. For guaranteed inclusion you can opt for a paid service but if you follow the steps below you have a good chance of having your Blogger blog properly indexed relatively quickly and without any cost
»»  read more

How To Place Adsense Ads Inside Your Blogger Header Section

The header section of a blog is one of the prime areas for AdSense and other ads so in this post i will show you an easy tip to place ads in your blogger header section.This will help increase your earnings and hopefully help make you more money from your blog.

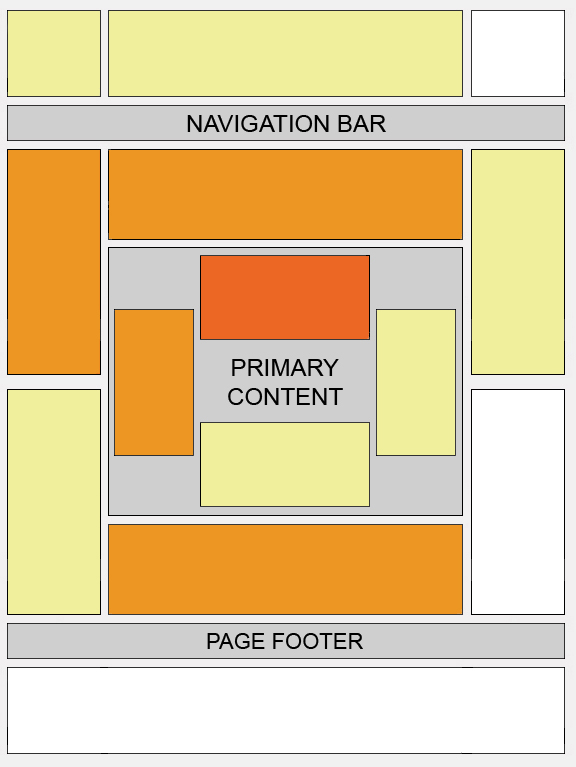
This image from Google displays the top positions for ads.


There are a number of ways to place AdSense ads in your header and i will cover other options in later posts.

In this post i will show you a nice clean and simple way to achieve this trick.

The ads will be placed differently to how i have them in my header to see a live demo of the ads in a header section click here


Here is how its done lets spice up your blog :

Getting your ad code ready.

Before you add AdSense code to your blog it must be parsed don't worry this is simple.

The first thing to do is go to your AdSense account choose the ad unit you want to use and get the code.

You now have the code copied
Paste your AdSense code in to the gadget and click 'convert' now copy your new parsed code.

If the add you are adding is a simple html banner ad you don't need to parse it you can skip that step.
Placing the code in your template.

Remember you can get all these tips sent directly to your email and stay a step ahead.Its quick easy and of course a free service provided by Google just fill in the form below the post.

1.Click 'layout'-> 'Edit html' for your blog.
(Tick The 'Expand Widget Templates' Box)

Blogger layout

edit html blogger

Expand widget templates blogger

2.Find the following piece of code in your blogs html:
(Click 'Ctrl F' for a search box to find the code)

<p class='description'><span><data:description/></span></p>


3.Paste the code for your AdSense unit directly Below the code above.


Example:


<div class='descriptionwrapper'>
<p class='description'><span><data:description/></span></p>

<-----YOUR ADSENSE CODE GOES HERE----->

</div>
</b:includable>

Before we finish : If you need more help or have an opinion or suggestion Please leave a comment Below.
To help you this is a Do-Follow Blog leaving a comment will also help your blogs Google rank.


Once you have added the code click save.

The ad has now been added to your blogs header,Remember it can take up to 10 minutes for AdSense ads to show on your blog.

Have you implemented this trick and do you think it will increase your AdSense earnings? Let us know..
»»  read more

Sep 21, 2010

Over 30 Awesome Google Gadgets For Your Blog

Almost every blog we visit uses the Followers gadget allowing visitors to Follow or Join the blog.However did you know the Followers gadget is actually just one of over 30 different gadgets available from Google Friend Connect ? Yep although the Followers gadget is the most popular from the Friend Connect directory there are some really useful gadgets such as Popular Posts, Featured Content, Top Ten Visitors, Newsletter and much more.Before we see how you can add any of these gadgets to your blog lets look at ten of the best.


Ten Google Friend Connect Gadgets

1. Social Bar - The social bar is a toolbar which can be added to the top or bottom of your blog and offers users options to join your blog, share, comment and more.


2. Comments Gadget - Users can add a comment or link.


3. Ratings And Reviews Gadget - Let people review and rate your posts or entire blog.


3. Interests Poll Gadget - The interests poll gadget can really help your blog.By asking visitors to take a quick poll Google can use the information to help target AdSense ads and add content to the Featured gadget.


4. Featured Content Gadget - The featured content gadget displays a list of posts based on the interests of your Followers.


5. Newsletter Subscription Gadget - Get visitors to subscribe to a newsletter.You can writen a weekly or monthly newsletter to all subscribers.


6. iPhone Members Gadget - This cool gadget is similar to the Followers gadget but is in the style of the iPhone.Visitors can scroll through information just like they would on an iPhone screen.


7. Recent Visitors Gadget - This gadget as the name suggests displays thumbnails of the followers who were recently on your blog.


8. Top Ten Members - Say thanks to the Followers who visit your blog the most.This gadget will display a list of Followers based on the numbers of times they visit.


9. Followers Cloud - This cool gadget displays the names of your followers in a cloud form similar to the label cloud.


10. Get Answers Gadget - This gadget is similar to a chat box and allows visitors to ask and answer questions.

»»  read more

Sep 18, 2010

Banned from Google AdSense - Common Mistakes

Common wisdom is that once you get banned from Google AdSense, it is very difficult to get reinstated. Therefore, you want to be careful not to break any of the rules stated in the Google AdSense Terms of Service.

Here are some common mistakes that result in banning from Google AdSense. Make sure to keep a close eye on all correspondence from the Google AdSense team and take swift action to fix what they bring to your attention.
Ignoring their warnings will likely lead to banning.


Banned from Google AdSense Mistake 1

Generating suspicious clicks.
It is against Google AdSense TOS to click on your own AdSense advertisements or to get others to click on your advertisements. Note that it is also illegal to solicit clicks from your visitors either verbally, or through your writing.
Accidents may sometimes occur, however, and according to the Google AdSense Team, infrequent accidents will not get you into trouble.
Here is a list of common suspicious clicks questions and answers by Google.

Sometimes, you may also be sabotaged. A third party may decide to do a series of illegal clicks on your advertisements for the purpose of getting you banned. If you notice any suspicious clicks of this nature, Google encourages you to report it to them.
Use Google Analytics or other website statistics tracking software to obtain as much information as you can about the suspicious clicks. This will get them banned instead of you.
Instead of reporting the incident to Google, some people suggest that it is better to stay under Google's notice and to just temporarily remove Google AdSense advertisements from the locations where there is suspicious activity. After waiting a few days, you can reestablish your advertisements and hopefully your saboteur has found something else to do with his time.
It is also possible to both report the clicks to Google, as well as to disable Google AdSense temporarily so that the abuse does not continue to occur while you are waiting for Google's response.
If your Google AdSense account gets banned because of invalid activity, you can appeal to Google using this form.
Note - It is also best NOT to 'reward other hubbers' by clicking on their Google AdSense advertisements as that can also be viewed as suspicious clicks.


Banned from Google AdSense Mistake 2

Publicizing your Google AdSense earnings information.
Opinions vary on this. Some people say that you are only not supposed to publish your Google AdSense CTR and eCPM figures publicly. Others say that you are not supposed to publish all exact earnings figures - including CTR, eCPM, number of clicks, and exact earnings numbers.
It is best to not publish a screenshot of your Google AdSense report page under any circumstances. If you do screenshots of your other Google AdSense pages or of other Google tools (e.g., Google Analytics) make sure that none of your account information shows up in these screenshots - including your earnings numbers, your e-mail, and your Google AdSense ID. This is important for your own privacy protection, as well as to stay on the good side of Google AdSense.
Personally, I would not publish any of my Google AdSense earnings figures except as general aggregates, e.g. It took me about 4 months to get my first AdSense check, or I earned about $2 in my first month on HubPages.

Banned from Google AdSense Mistake 3

Stealing content.
Plagiarising content or copying content without permission are also against Google's TOS. Here are some common questions and answers about Google's copyright infringement policy.
If the content owner files a valid DMCA report on your online article, you will most likely get your Google AdSense account banned, with no hope of getting it back - ever.
Note that copyright infringement does not only apply to text, but also to images, photographs, and graphics, Do not include an image, photo, or graphic unless it is public domain. Make sure to follow the rules of the public domain license placed on the image.
Images that are not explicitly flagged as public domain are considered to be copyrighted by the original creator. Do not use any of these images unless you have obtained permission from the original creator. Always attribute all images (public domain, and non public domain) back to their site of origin, and to their original author.
Note - copyright laws applies to videos, including youTube videos, as well as text and images.
Preserve your online legacy by only producing good and original content. This will also be the best way to get traffic and increase your Google AdSense earnings.

Banned from Google AdSense Mistake 4

Generating fake traffic.
Do not try to trick Google by generating fake web traffic to your Google AdSense sites.
What is fake web traffic?
Fake web traffic is anything that generates false impressions on your Google AdSense advertisements, including -
  1. Participating in link farms or link exchange directories. Do not link to link farms or link directories or you may not only find your Google AdSense account banned, but also that you have been dereferenced by Google Search.
  2. Participating in rank exchange or rank purchasing activities. Do not try to purchase a higher Google search rank from another site. Google is good at tracking down these 'sellers' and when that happens, you will lose your money, your purchased rank, and also your Google AdSense account.
  3. Participating in traffic exchange programs.
  4. Using doorways, page cloaking and other similar techniques to get higher search engine rankings and to misdirect your visitors.
Here is a list of legitimate ways from Google on how to increase your Google AdSense traffic. Here is a list of things of avoid.

Banned from Google AdSense Mistake 5

Getting multiple Google AdSense accounts.
Currently, Google only allows one Google AdSense account per person or entity(e.g. company or organization). Some non-US publishers have reported that Google does not even allow two people from the same address to have separate Google AdSense accounts.
Trying to trick Google into giving you multiple AdSense accounts can get all of your accounts banned. If you have accidentally applied for multiple Google AdSense accounts, then it is best to write to them and apologize for your mistake.
Some publishers have gotten their AdSense accounts banned because it is related to another banned account. Be very careful where you place your Google AdSense advertisements and only include them in your own sites or a very trusted third party or business, such as HubPages.
Otherwise, you may get penalized for someone else's wrongdoing.

Banned from Google AdSense Mistake 6

Showing pornographic material or linking to pornographic sites.
Google AdSense does not allow advertisements to be placed with certain types of content including adult, violent, and racist content. Content relating to alcohol, tobacco, firearms, and gambling are also not allowed. For a full list of unacceptable content topics, refer to the Google AdSense Program Policies.
For this reason, do not distribute content, including website templates or blog themes that contain your Google AdSense advertisement capsules. Since you have no control over what others publish in their website using your themes or templates, you may end up getting banned because of what others are publishing. For even better protection, you can go to AdSense Setup >> Allowed Sites on your Google AdSense page to restrict your Google AdSense-ID to only trusted websites.
Some sites that support pornographic or other unacceptable content may point to your online site or articles. There is nothing you can do about that, so you will not be penalized for incoming links, just for outgoing ones. Be careful not to show pornographic material, use pornographic related text, or link to any pornographic sites.
Note - make sure that the comments that you receive on your online articles also do not contain any keywords or links that are against Google AdSense's content guidelines. These bad comments can also affect your Google AdSense account.

Banned from Google AdSense Mistake 7

Modifying the look and feel of Google AdSense advertisements.
Understandably so, Google AdSense is very particular about advertisement tampering. You are not allowed to alter their advertisements in any way. You are not allowed to put competing advertisements that have the same look and feel in the vicinity. You are not allowed to place images close to your Google AdSense advertisements in an effort to draw your visitor's attention to the advertisements and increase your click through rate.
There are also restrictions as to where you can place AdSense advertisements. You are not allowed to put advertisements in pop-ups, emails or software.
Here are a list of common questions and answers about advertisement placement from Google AdSense .
If you are only showing Google AdSense advertisements through HubPages then you do not need to worry about these ad placement rules as it is taken care of for you by HubPages.

Banned from Google AdSense Mistake 8

No privacy policy.
Google requires all AdSense sites to put a cookie disclosure notice in their privacy policy.
AdSense publishers must have and abide by a privacy policy that discloses that third parties may be placing and reading cookies on your users' browsers, or using web beacons to collect information as a result of ad serving on your website. ~~ [Excerpt from Google AdSense Program Policies]
This only applies to AdSense publishers that run their own site, such as a personal website or a personal blog.
Publicly hosted sites such as HubPages, Blogger, and others have their own privacy policies, that will likely meet all the requirements of Google AdSense.
If you are not sure, scroll down to the bottom of your public page (e.g. hub) and locate where the copyright message is. Included close to the copyright message is a link to the website's privacy policy. Click on that and check to see if it contains all the elements stated by Google AdSense.
If you maintain your own website or your own blog, then it is important to include a similar privacy policy for every page that contains Google AdSense advertisements. It is easiest to include a 'Privacy Policy' link near to your website's copyright message as is done in most professional sites.
Refer to the Google AdSense Program Policies to determine what you should put in your website's privacy policy.
Failure to comply to this requirement could get your Google AdSense account banned.

Life After AdSense Banning

In the unfortunate circumstance that you do get banned by Google AdSense, here are some resources of what you can do to get reinstated.
All of them seem to require a lot of work and some luck as well, so it is best to just keep a careful watch of Google's TOS and program policies.
Reading Google's AdSense rules carefully may not be the most interesting thing to do with your time but it is necessary to keep yourself from getting banned for accidentally breaking a rule that you may not even be aware of.
Remember to always be polite and professional when corresponding with Google AdSense. Do not publicly bad-mouth Google, or otherwise alter Google's trademark.
»»  read more

Aug 25, 2009

Generating Adsense for Content ads, including custom channel

A reader of this blog asked about custom channel. I thought that it would be good to make a post on how to generate AdSense script and include in it creating custom channels to answer. So, here it is:

To generate the script, the first thing you have to do is to sign into your AdSense account. Once you are logged in, the first thing you see will be your report. Above the report will be a tab "AdSense Setup" (see screenshot below. Click to enlarge)


Click on that tab and you will be presented with another page with 3 choices - AdSense for Content, AdSense for Search, and Referrals. (Click on screenshot to enlarge)


If you want to generate text and/or image ads, click on the "AdSense for Content". You will be again taken to a page with 2 choices - Ad Unit and Link Unit. (Click on screenshot to enlarge)


Rather than uploading another sceenshot to show what an ad unit is, I will refer to what you can see in this blog. I use a 3 column template, and I have chosen to display a Skyscrapper Ad Unit on the left sidebar and a link unit under the Header. Right under the Header, you will see a link unit displaying most probably 5 text links. A link unit is a real space saver as it takes up so little space. You can chose either by clicking the appropriate radio button. Let's say, you want an ad unit. You can just tick the radio button against "Ad Unit" and click Continue at the bottom of the page. If you want only text ads or only image ads, you will have to click the down arrow in the drop-down menu and select your choice. In my case, I have chosen both text ads and banner (this is the default), so you may see either text ads or a banner in the left sidebar.

Link units are useful when you do not want ads on your site to appear intrusive by having prominent ads. For an example, look at the link unit at this site Testing Blogger Beta (close new window to get back to this page). The link unit is just below the header and does not take up much space. The space above the fold (the part of the screen which a visitor see without having to use the vertical scrollbar) is valuable real estate, and you would want to maximise the use of that space. That ad unit is obtained by selecting the 728x15 format. There are other formats and which format would depend on where you want to place the link unit. You will not get anything if someone click on a link, but if they click on an ad in the resulting page, then you will be credited for that click. Some people have reported good results with the use of link units.

Assuming that you have selected Ad unit, you will be taken to another page with a number of choices. First, you need to select the format, and the format you choose will have to fit into the space that you intend it to display. For the one in the left sidebar in this blog, I chose the 160x600 Wide Skyscraper. For the link unit below the header, I chose the 728x15 ad format and chosen to display 5 ads per unit.
Choosing colors

The next step is to choose the color for your ads background, text, border, etc. You may choose to do nothing and just click continue, and the colors used will be the default blue1. If you want to blend the colors with the colors of your site, you will have to edit the palette. If you wish, you can just select the color direct by typing in the HTML color code or clicking on the color box next to the relevant item, but it will mean that each time you do another ad and you want back the same color scheme, you will have to go through the whole process again. It is better to click EDIT PALETTE, then choose the color, and then save the palette under an suitable title.


This unfortunately, will mean that you will have to start the process described above all over again. But it willl have the advantage that each time you want to generate another ad unit or link unit, you can just select it from the drop-down menu. To aid you in selecting the color for the ads, I suggest you get the free ColorPic from Iconico (close new window/tab to return to this page).

You also have a choice of whether to display PSA (Public Service Advertisements) for which you do not get any credit for clicks, show non-Google ads from another URL or just fill the space with a solid color when there are no suitable ads in the pool to display on your site. I myself have chosen PSA, however the choice is completely up to the individual.

Setting up custom channels
Once you are satisfied with your choices above, you click "continue" and will be taken to the next page to add/select custom channels. Custom channels are a tool you can use to view more detailed reports about the performance of specific pages and ad units. This is to help you track the performance of your ad units. With custom channels, you can experiment with different color palette, different ad format, different placement, and if you see a particular channel not doing well, you may change it to see if you do better. This is called Optimization. You play around with different color palettes, ad formats, placements, etc. until you find one that give you the best performance. To add a custom channel, you click "Add new channel" if you have not created any channel before, or if you want channel not in the list of channels already created. You can create/choose up to 5 custom channels for an individual ad unit. See screenshot below (click to enlarge):


After you have made your choices, you click continue and you will be taken to a page where you can copy the script generated to paste in your template. You just click on the inside of the box and the whole of the script will be highlighted, and you just right-click and select "Copy" (or ctrl+C), then paste in the relevant place in your template. If you are using Blogger classic template, the following posts will help you to paste the codes:
Where to paste the AdSense script (close new window to get back to this page)
For ads after each post, where to paste the script (close new window to get back to this page)

If you are using Blogger Beta template, the process is easier. Refer to the following posts:
Blogger Beta - adding advertisements, hit counters, etc. (click "Back" button to return to this page)Note: This post was written during the time when AdSense ads wouldn't display in Blogger Beta blogs, but that bug has been ironed out already. Read the updates.
Adding graphic, ads, text, etc. to the Header of a Blogger Beta blog (close new window to return to this page) Note: This post was written specifically for adding graphic, but can be used for ads, text, etc.
»»  read more